What to Expect During Pool Excavation and Construction
If you’ve never built a pool before, the excavation phase can be a bit of a shock. One day your backyard looks normal; the next, it’s full of equipment, mud, and a hole big enough to park a truck in. It’s loud, messy, and fascinating — and it’s also where your dream pool officially begins to take shape.
Understanding what happens during construction helps take the stress out of the process. You’ll know what’s normal, what’s temporary, and what’s a sign your builder knows what they’re doing.
Let’s break down exactly what to expect once the machinery rolls in.
Laying Out the Pool
Before the first shovel of dirt is moved, the crew will mark your pool’s shape and position. We use stakes, spray paint, or string lines to outline where everything will go — the pool shell, decking, steps, benches, and equipment pad. This is your last visual checkpoint before digging starts.
Many homeowners like to walk the perimeter at this point, making sure the pool lines up with doors, patios, or views from the kitchen window. Adjustments now are easy; once we start digging, not so much.
We’ll also confirm where to place the dirt spoils — the pile of soil that comes out of the ground. Depending on your lot, we might haul it offsite or use it for grading later.
Excavation Day: Controlled Chaos
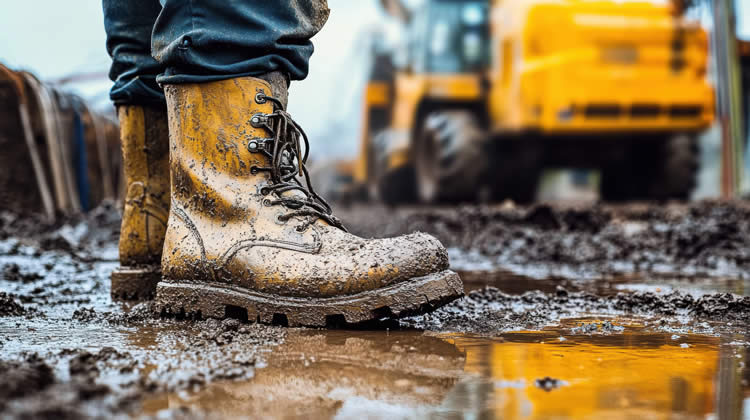
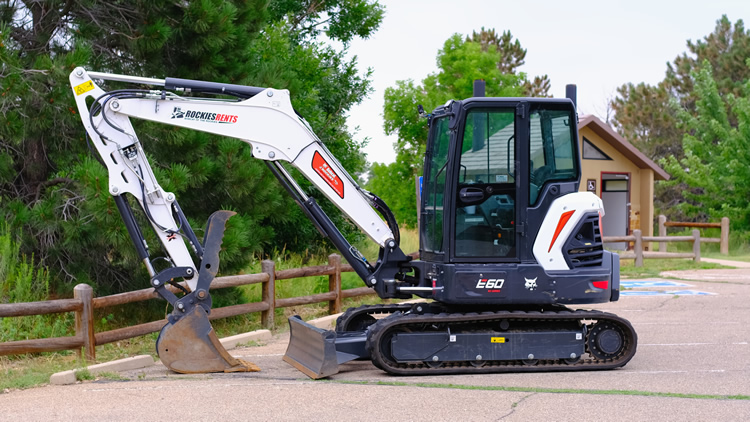
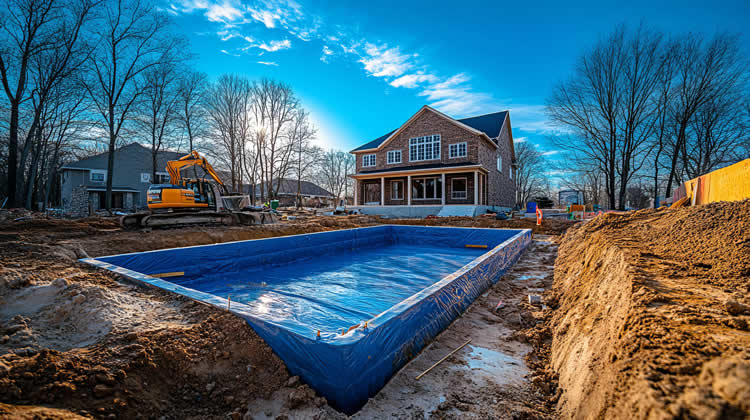
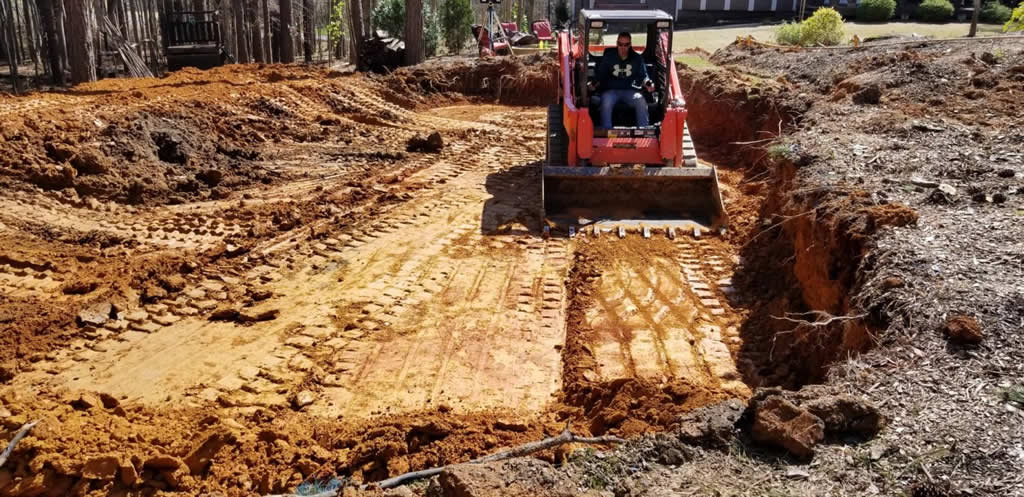
Excavation usually takes one to three days for most residential pools. The crew will arrive early with a skid steer or excavator, depending on access. You’ll hear the beeping of heavy equipment, smell diesel, and see red clay flying — it’s all part of the process.
If you live in North Georgia, you’re probably familiar with our famous red clay. It’s dense and strong, great for pool stability, but it can also be heavy and sticky. Rain can turn it into a mess quickly, so weather often dictates the pace.
During digging, we constantly measure depth and slope. Pools aren’t just holes — they’re engineered shapes with precise angles for floor, walls, and benches. We check elevations every few feet to ensure the shell fits the design.
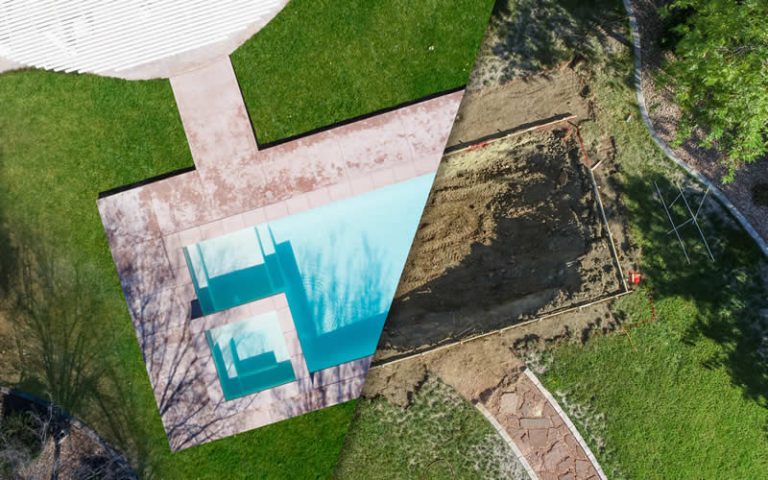
Once the hole is complete, the shape becomes real. Homeowners often say, “It looks smaller than I expected,” but don’t worry — water, decking, and landscaping will completely change your perception later.
Managing Access and Safety
Excavation equipment is large, and yards often aren’t. We protect driveways with plywood, use temporary fencing for safety, and take care to minimize damage to grass or irrigation lines. If access is tight, we may need smaller machinery or extra time — another reason site prep matters.
For homes with limited side yards, we’ll measure equipment width weeks before the start. In some cases, fences or gates are temporarily removed. It’s normal, and your builder will restore everything afterward.
Safety is non-negotiable. During construction, keep children and pets away from the work zone. Even when crews aren’t present, the site remains hazardous until the shell is complete.
Rebar and Forming: The Pool’s Skeleton
Once the excavation is finished, the next crew steps in to install steel rebar — a grid of reinforcing rods that give the pool its structural strength. This stage usually takes two or three days. The rebar is tied by hand, piece by piece, forming the outline of walls, steps, and benches.
Around the same time, plumbers begin the rough-in: installing pipes that will carry water from the pool to the filter and back again. You’ll see white PVC running along trenches, tied neatly against the rebar framework. Every pipe and fitting gets pressure-tested before concrete is sprayed.
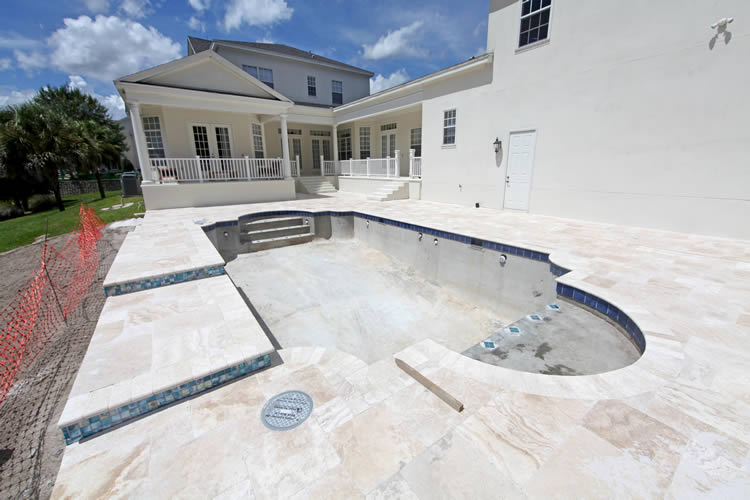
It’s at this stage that your pool truly begins to look “real.” You can walk down into it, see where the steps will be, and start imagining how the space will feel when finished.
Shotcrete or Gunite Application
When the rebar and plumbing pass inspection, it’s time to apply the concrete shell. For gunite pools, this involves spraying a high-pressure concrete mixture through a hose onto the steel framework. Skilled craftsmen then shape and smooth the surface by hand.
The process is loud but mesmerizing — the pool’s shape comes to life in a matter of hours. Once the concrete is in place, it needs to cure for about a week. During that time, we’ll spray it with water periodically to strengthen the shell and prevent cracking.
If your pool is fiberglass or vinyl, this step looks different. A fiberglass shell arrives pre-formed and is set into the excavated hole, then leveled and backfilled. Vinyl-liner pools get steel or polymer wall panels bolted into place before the liner is installed.
Coping With Weather and Delays
Here’s the truth about construction in Georgia: weather runs the show. A day of rain can push schedules back several days, especially if soil becomes saturated. It’s not just about mud — concrete and backfill need dry conditions to bond correctly.
Good builders plan buffer time into the schedule and communicate clearly about delays. If rain’s in the forecast, we may tarp the site, install temporary pumps, or shift to another task until conditions improve.
The key for homeowners is patience. A short pause now prevents long-term issues later. Once the weather clears, work typically resumes right where it left off.
Equipment Noise and Neighborhood Etiquette
Construction brings noise — saws, air compressors, mixing trucks — and sometimes early starts. We do our best to coordinate work hours within local regulations, but it’s a good idea to give your neighbors a heads-up before the dig begins.
Most neighbors are curious more than annoyed; they’ll want to peek over the fence and see the progress. Keeping communication friendly helps maintain good will during the few weeks of disruption.
Clean-Up and Transition to Finishing Stages
When excavation and shell construction are complete, we clean up the site and prepare for decking, tile, and coping. This transition marks a major milestone: the loud, messy phase is over, and the artistic phase begins.
You’ll see crews smoothing edges, cleaning debris, and checking grading. If your design includes retaining walls, planters, or a raised spa, those structures go in next. Electrical conduits and plumbing stub-outs are connected and tested again.
Even though your yard still looks rough, this is when homeowners start to see the finish line. The foundation is solid, the systems are in place, and everything that follows is about refinement and beauty.
A Few Insider Tips
Over the years, I’ve learned a few truths that make the excavation phase easier for everyone involved:
- Expect mess. Dirt, dust, and tire tracks are part of the deal. Everything will be cleaned and restored before completion.
- Trust the layout. It might look smaller now, but once decking and water are in, scale changes dramatically.
- Keep gates accessible. Crews often come and go at different times; locked gates cause delays.
- Stay flexible. Weather, inspections, and deliveries all affect progress. Communication is key.
- Take photos. It’s fun to see the transformation, and documentation helps later if you ever add features or sell the home.
Wrapping It Up
Excavation and early construction may not be the prettiest parts of the process, but they’re the most critical. This is where your pool’s structure, plumbing, and stability are born. A skilled builder treats this phase with precision — measuring, reinforcing, inspecting, and double-checking every step.
Within a few short weeks, that noisy, muddy hole becomes a pool that will last decades. Once you understand what’s happening, you’ll see the beauty in the process — the craftsmanship beneath the surface that makes your pool safe, strong, and perfectly shaped for your backyard.
When the first tile goes on and the dust settles, you’ll realize something simple but true: the best pools aren’t rushed; they’re built right, one careful layer at a time.
Let’s Talk …
Let us take care of your Pool & landscape
At Aqua Fun, we don’t just build pools — we build relationships that last for seasons to come. Our team takes the time to understand your space, your needs, and how you actually use your backyard. Then we craft solutions that make every swim, soak, or gathering more enjoyable. It’s not about selling you more; it’s about helping you get it right.
If you’ve been thinking about improving, repairing, or re-imagining your pool, let’s talk. We’ll meet you where you are, explain your options clearly, and make sure the whole process feels simple and stress-free. That’s the Aqua Fun way — real people, real care, and results that speak for themselves.
Mon – Fri
8:00 – 6:00